Managing Properties
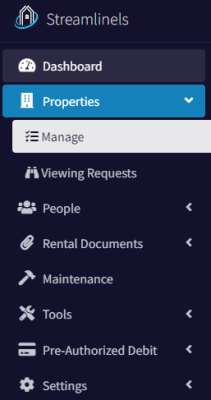
In order to successfully utilize the Streamline platform, you’ll need to upload information on each property that you own or manage. To do so, start by navigating to the Properties menu, then to the Manage sub-menu.

From here, you can create your first property.
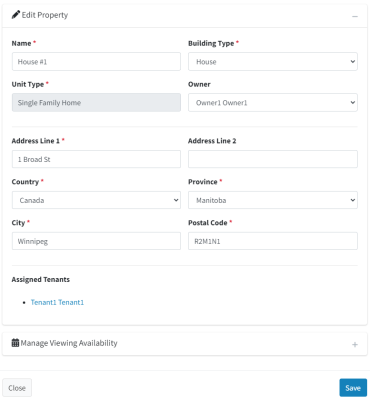
Give your property a name, select a building type (let us know if the list is missing something), and select unit type. The following is a quick list of different scenarios you may come across:
- Single family home – choose Single Family Home
- Single family home with two separate units – choose Multi Unit
- Single condo in a condo building/complex – choose Single Family Home
- Apartment building with many units – choose Multi Unit
If you chose Multi Unit, enter a comma delimited list of the units contains withing the building (e.g. “101, 102, 103, …, 408, 409).
If you are a property manager, you may set the owner of the property in the Owner field.
After that, enter in the address details and save.
Once saved, you can edit any information about the property, except for the Unit Type. Below the property information is the list of tenants that are currently assigned to a rental agreement for this property. And below that is the Manage Viewing Availability section. We discuss this section in detail here.

Multi Unit Properties
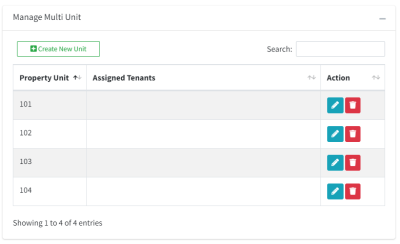
If you created a multi unit property, you can edit the details of the overall property, or the property unit details for each unit. In the property details dialog, towards the bottom you’ll see this:

From here you can add/delete units, edit them (i.e. change the name), view the unit’s application link, and view assigned tenants.
Managing Rental Agreements
Under the Action menu for each property is an option to either Create or Edit Rental Agreements. If there are currently no rental agreements, you are able to add your first one from here. If there are already one or more rental agreements, you can edit an existing one or create a new one.
Managing rental agreements is typically done from the rental agreements page, however this option will allow you to edit them on a “per property / unit” basis.

