
Pre-Authorized Debit for Tenants
If your landlord or property manager is using our platform to process rent payments, this guide will tell you everything you need to know.
First, your property manager will need permission from you to make withdrawals. Then, they will set up your monthly rent payment. After that, the funds are automatically withdrawn each month, and there’s nothing more for you to do.
Giving Permission for PAD
When your property manager is ready to request permission from you to withdraw funds, you will receive an email and optionally an SMS. This will contain a link, directing you to a form.
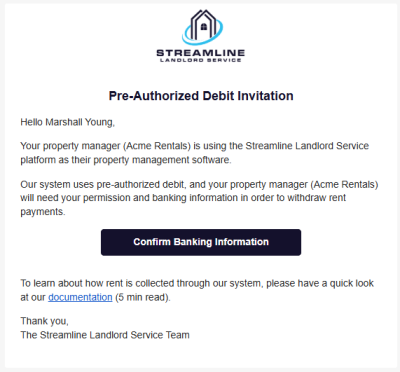
The email will look like this:
The SMS will look like this:

And then the form looks like this:
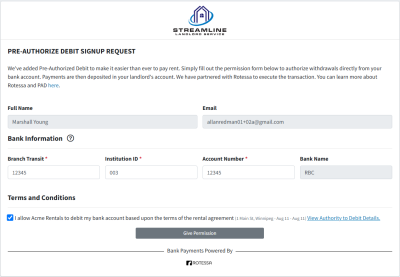
Fill in your banking information, then check the permission checkbox button at the bottom.
It’s possible that there are two permission checkboxes. This will happen if your property manager has set up the rent payment to flow directly to the property owner. Checking both boxes will enable the property manager to direct payments either to their company or to the property owner. This is recommended.
Authority to Debit
Once you have filled in your banking information, there is a link “View Authority to Debit Details” that become enabled. This will open a dialog that shows you the details of the PAD permissions that you have agreed to. If anything looks incorrect, make sure to notify your property manager.
This information will also be emailed to you, once you have submitted the from.
Click the Give Permission button to submit the form.
Just a Note
You may have noticed that there is a message at the bottom of the screen that says “Powered by Rotessa”. Rotessa is our partner who is responsible for scheduling the transactions with the bank. We need to share a small amount of information with them, to make this all work. You can read more about our Privacy Policy and Rotessa’s Terms and Conditions for Canada.
The Tenant Portal
As a tenant, you’re under no obligation to use our platform, even if your landlord has signed up and is collecting rent through our Pre-Authorized Debit feature. There is a section of the site which gives you information for Pre-Authorized Debit. To get there, simply log into the site, then choose “Pre-Authorized Debit” from the left navigation menu. You’ll see a page that looks like this:
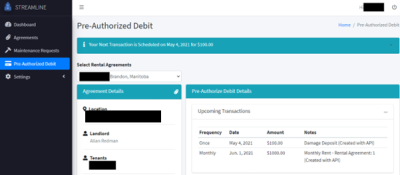
If you are leasing more than one unit, you’ll see a dropdown menu to select the rental agreement. If you only have one leased unit (which is 99% of people), you won’t see this at all.
On the left of the page is some basic information about your lease. Details such as the address, your landlord’s name, the tenants on the lease, and the start and end dates.
In the section on the right, you can see upcoming transactions, past transactions, and your current information.
Updating Banking Information
To update your banking information, log on to the platform, choose Pre-Authorized Debit on the left navigation menu.
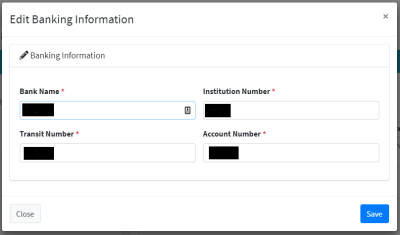
Expand the My Information section and click the Update button. This will allow you to update your bank information.
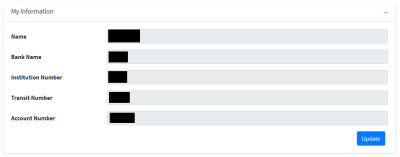
Once the dialog is opened, you can set the new banking information and click Save.
Banking information is managed on a per lease basis, so if you’re leasing more than one unit and want the payments coming from different bank accounts, make sure to select the correct rental agreement from the drop down.
Deactivating Pre-Authorized Debit
In the future, if you ever decide that you want to deactivate Pre-Authorized Debit, let your property manager know, and they will deactivate Pre-Authorized Debit on their end.
If you have any questions or experience any issues, you can contact support here.