
This guide has been created to get you up and running with Tenant Verification Reports (TVRs) as fast as possible. If you’re looking for the quick start guide for setting up rent payments and managing your properties through our system, you can find that here.
A TVR is a report that is typically run when considering a new prospect for a unit. It consists of two checks, and there is an optional 3rd check:
- Softcheck – Background check of over 200k publicly available databases to build a detailed risk profile.
- Equifax Credit Report – Understand the prospect’s current credit score and debt obligations.
- Enhanced ID Check – Uses AI to ensure that the prospect’s ID is real and belongs to them.
These are used as a part of your screening process for new applicants. This will give you a full picture of the person, and their financial situation.
If you want to read our full article on TVRs, you can find that here. This guide will focus more on getting you started for running these reports.
Step 1: Creating an Account
Start by going to the registration page, located here. Enter in an email address and password and click the Next button. Then, make sure to choose the Property Manager option at the top, and enter the remaining details.
A confirmation email will be sent to your email address.
Once you have confirmed your email address, you will be able to log into the system.
After email confirmation, you will receive an onboarding email with some quick links, as well as the contact information for your designated customer success team member at StreamlineLS. They will be your go-to person for ensuring that you get the most out of our platform.
Step 2: Add Team Members
As a property manager, you likely have a support staff who will also need access to your account on our platform. Each team member can be added as a separate user, with their own credentials. When they log into the platform, they will still be using your main account but just accessing it under their credentials.
To create a Team Member, navigate to People / Team Members on the left navigation.
Click on Add Team Member and fill in their name and email address and click Save.
They will be sent a confirmation email. When they confirm their email address, they will be prompted to set a password. Now, they can log into the platform under their own credentials.
A team member can perform all the same functions as the main account, but they cannot create other team members.
Repeat this process for each staff member that you would like to have access to your account.
Step 3: Creating a Prospect
Once you have created an account and added any team members that will need access to your profile, we can now begin adding prospects. A prospect is someone who doesn’t currently rent from you, but who you’re considering.
Start by navigating to People / Prospects in the left navigation.
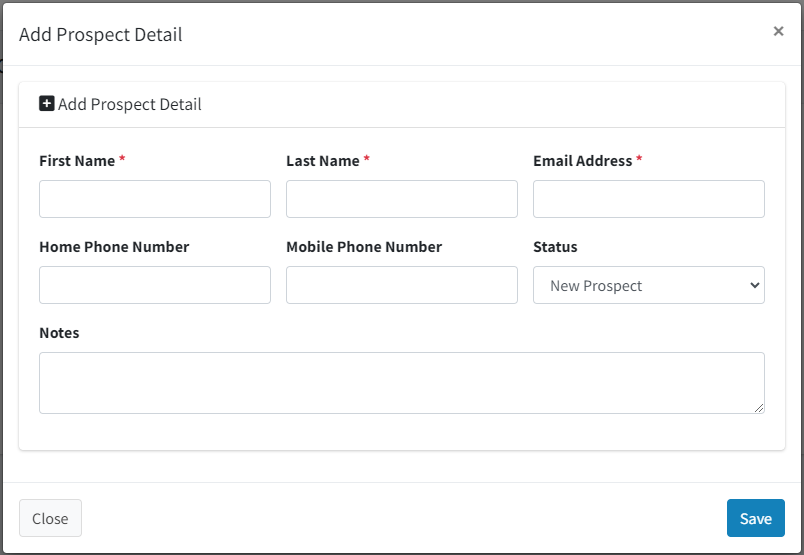
Click Create your First Prospect.
Fill in their first/last names and email address. Click the Save button.
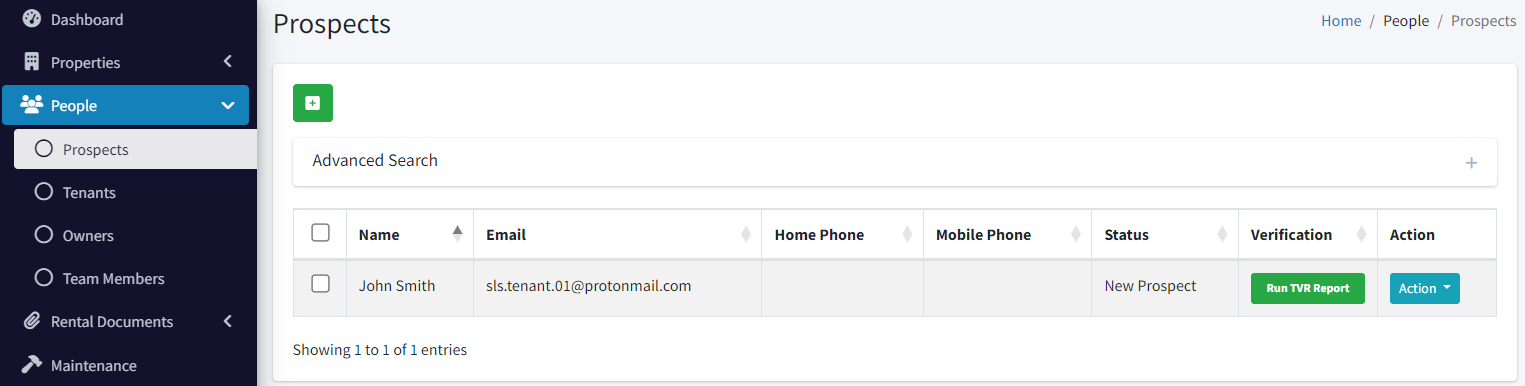
At this point, you will have a prospect created and are ready to run the Tenant Verification Report.
Step 4: Validating your Identity
Before you can run any a TVR, we must first validate your identity. This is for legal/compliance purposes. We have two ways of doing that.
1. Registering for PAD
If you plan on automating your rent payments by using PAD, we recommend just following the PAD registration process. Since we validate your ID during that process, we will consider you validated for running TVRs once that is completed.
The guide for doing so can be found here.
2. Uploading Your ID
If you don’t plan on using our PAD feature, you can upload your ID for us to validate separately. From either the People / Prospects or People / Tenants page on the left navigation, click the ‘Run TVR Report’ button.
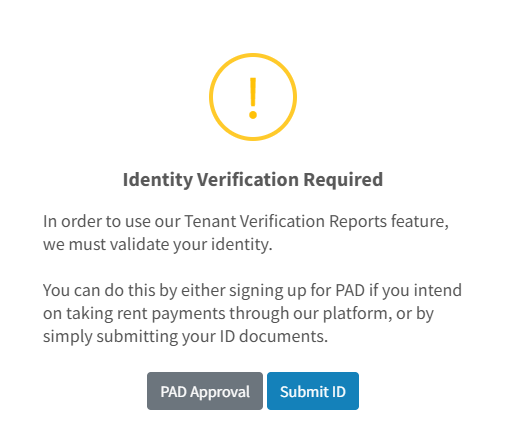
Click the ‘Submit ID’ button, and then you will be prompted to upload your information and ID.

You will need a smart phone, and some form of government issued ID. A driver’s license is the most common, but you can also use a passport or residency card.
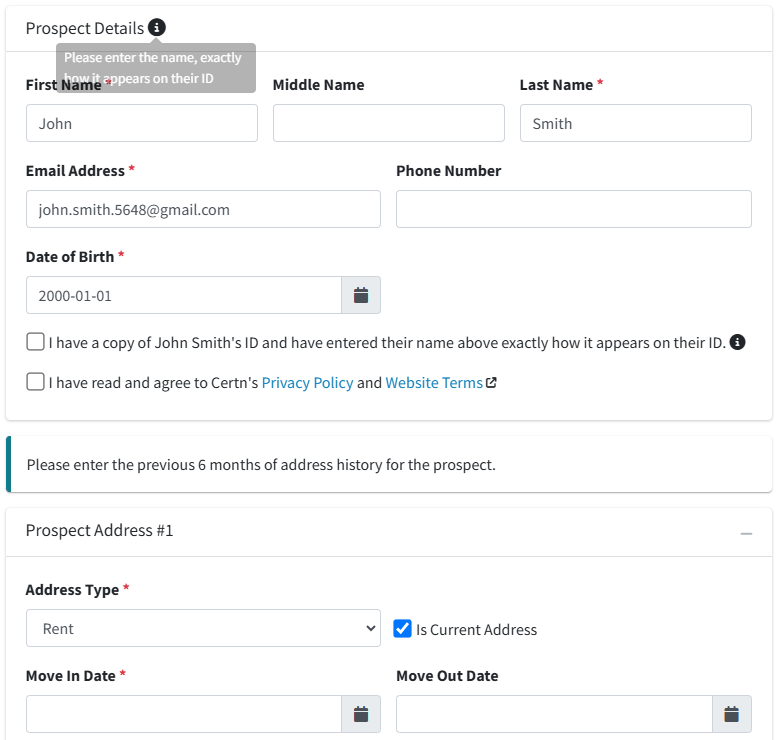
IMPORTANT: Make sure to have your first, middle, and last names exactly as they appear on your ID and ensure that your address is correct as well. Ensure to include your middle name if you have one on your ID even if the application form doesn’t show an asterisk in association with that field indicating it as required.
After you submit your information, this dialog will appear:
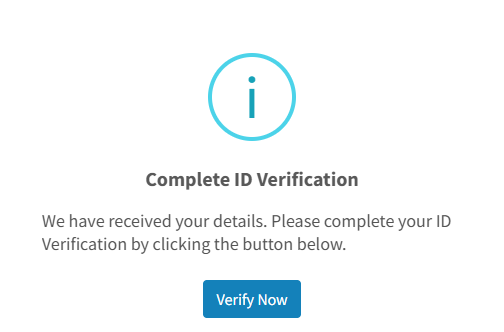
Click the ‘Verify Now’ button and you will be shown a QR code. Scan the QR code with your phone (or click the ‘Continue on this device’ button if you’re already on a smartphone) and follow the instructions. You will be prompted to take a photo of the front of your ID, the back of your ID, and a selfie (photo of your face).
Once that’s done, the information will be submitted to Certn for validation. We should get results back in a few minutes, and you will receive an email notification letting you know that you are now able to use the TVR feature.
If there is an issue with validating your ID, we will reach out to you with the next steps to get you verified.
You will also need to add a payment method (found under Settings / Billing / Payment Methods on the left navigation).
Step 5: Running a TVR
As mentioned above, this process can be done from either the Tenants page or the Prospects page. This guide will assume you’re running a TVR on a prospect, as that would be the typical use-case.
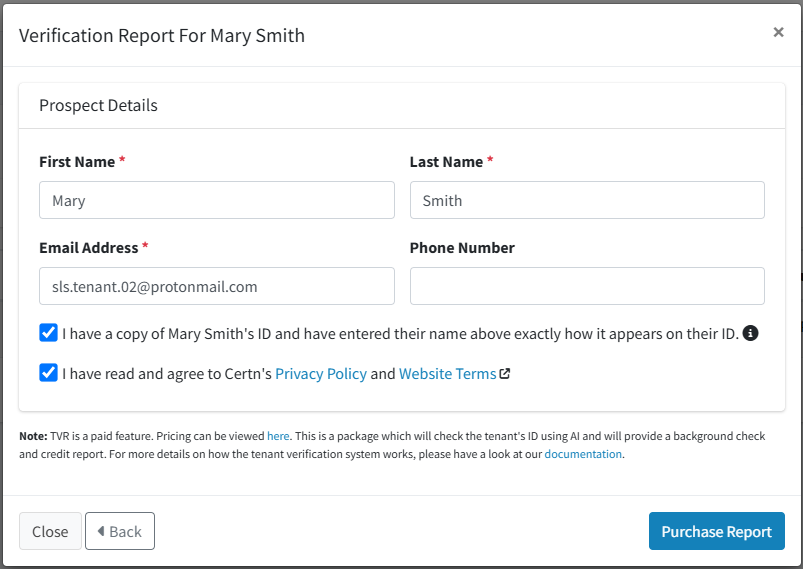
Once you have a prospect added, click the Run TVR button. You will be presented with a dialog asking you three questions. In order to run a background/credit check on someone, you need their permission. If you do not have this permission documented, you can still run the TVR through the second option format without their information and permission. You will see the instructions for that in the section below.
You’ll also need at least six months of address history for them.
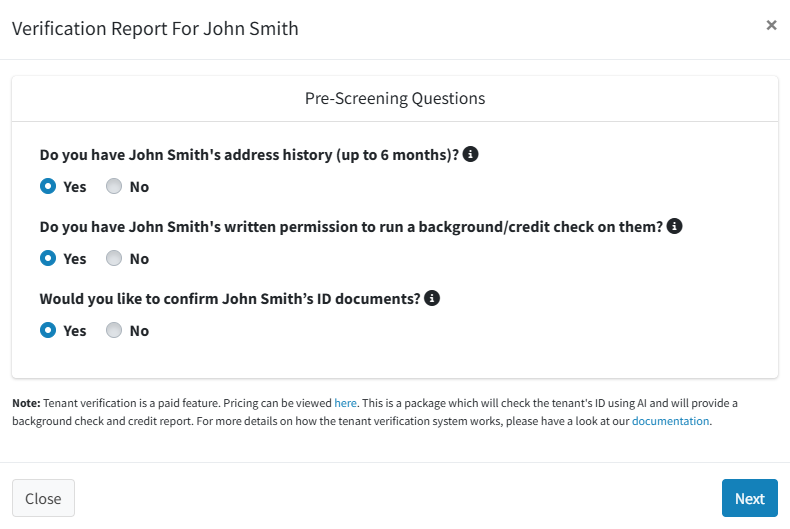
If you have both their permission and address history, you will be prompted to enter in their information. You need to enter their name (please ensure it is exactly as it appears on their ID – include their middle name if one is listed even though no asterisk is indicated on the form), address information, and agree to the terms and conditions, as well as ensure that you have a copy of their ID (this is a regulatory requirement).
When entering in their address history, if their first address doesn’t cover at least six months, you can add in up to two additional addresses to cover this time period.
Once you click the ‘Purchase Report’ button at the bottom, their information is submitted to Certn.
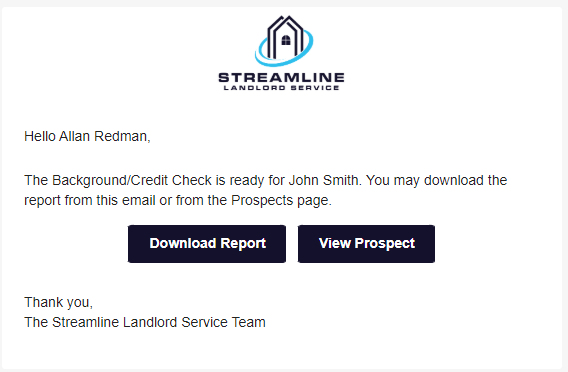
You will receive a notification within a few minutes when the report is ready. The report can be downloaded through either the platform or the email that is sent.
Email:
Prospects Page:
![]()
Prospect Details Dialog:
Running a TVR Without Permission or Address History
If you answered ‘no’ to either of the first two questions, an invitation is sent to the prospect through email (and SMS, if you have that feature enabled). This will prompt them to ensure that their name and address information is correct, and to confirm that they are giving you permission to run this check on them.
In this case, the only information you need to add is their name and email address. A message will be sent to them to confirm the rest of their information.
If you do have their address information, you are given an opportunity to enter it, but it will still be sent to the prospect for confirmation.
Once the prospect receives the email, enters their information, and clicks the confirm button, the information is submitted to Certn, and you will have the report back within a few minutes.
If you need to resend the request to them, you can click on the ‘Resend Request’ button on the Prospects page.
ID Check
If you answered ‘yes’ for the 3rd question, that means that you’d like to validate their ID as well. In that case, once you have submitted their information (or they have, depending on if you had permission to run the report or not), they will be sent an additional notification.
The notification will have a link where they can scan a QR code. This will take them to the ID upload page. This is the same process as when you validated your ID. They are prompted to take a picture of the front and back of the ID, plus a selfie.
Once that is done, the information is submitted along to Certn, and you will receive a notification when the report is ready. This should only take a few minutes once the prospect has submitted their information.
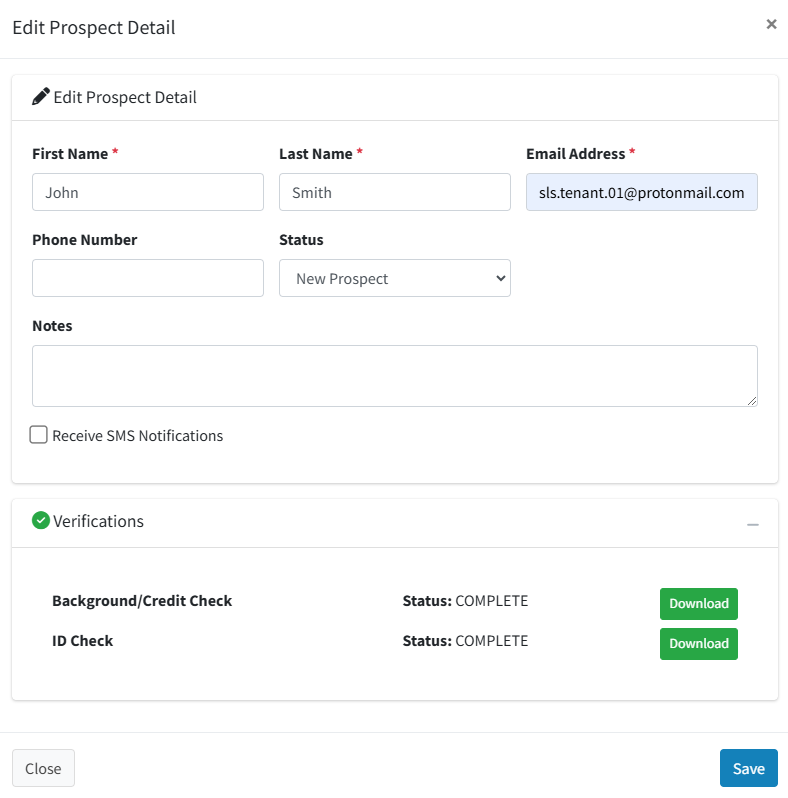
Downloading the Reports
The background/credit check and ID checks come as two separate reports. You can download them from the emails, or if you go into the details of a prospect, you can download them from the verifications section.
Prospect Details Dialog:

Resending Requests
If you didn’t have permission and the address history of your prospect, a request would have been sent to them. You can resend these notifications by going to the prospect details and click on the verifications section. There will be a button to resend the background/credit check request, and if you chose to validate their ID, there will be a separate row and button for that.
Summary
Tenant Verification Reports are a powerful feature that enables you to make informed decisions for prospective tenants. We highly recommend using this as part of your tenant screening process.
If you encounter any issues with this, please reach out to support@streamlinels.com.